In this article:
Overview
A control number is an incremental value representing the number of times a Flow that contains an outbound EDI adapter executes. Each time the Flow executes, the control number increases by one. Control numbers are relevant for EDI files output from the Chain.io platform as part of the Flow execution process. In a standard X12 EDI, there are three segments for which we generate control numbers.
Accessing Minimum Control Numbers
To utilize Chain.io’s minimum control number feature, first sign in to your Chain.io portal account at https://portal.chain.io/.
- At the top menu bar, click Workspaces and select the Workspace of choice.
- At the top right of the screen, click Workspace Settings from the hamburger menu.
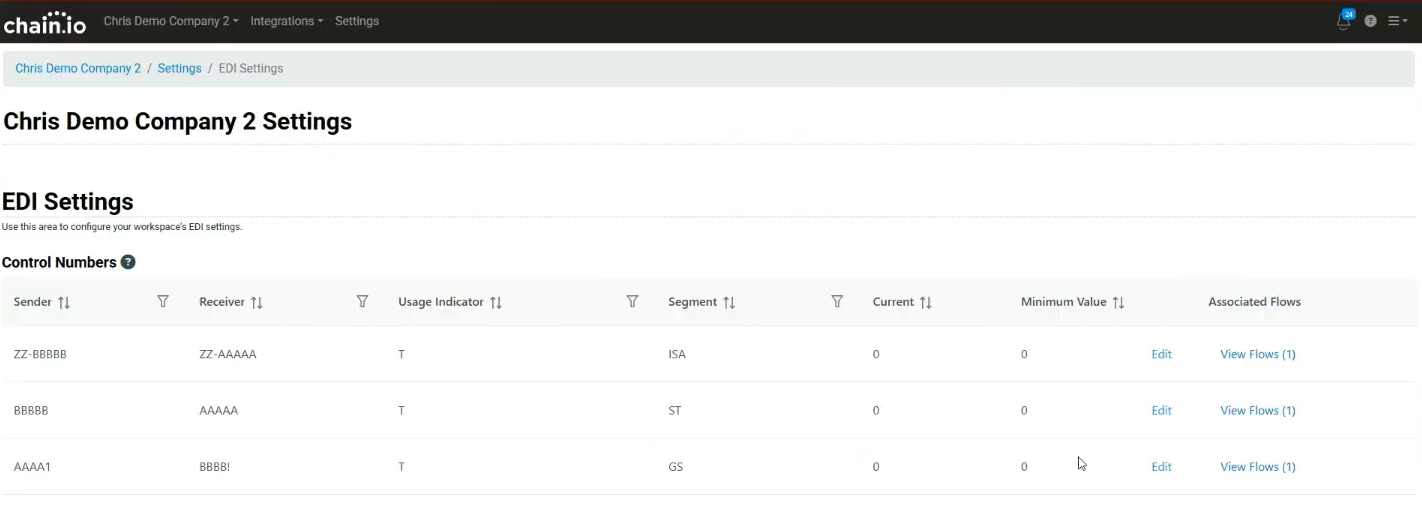
Navigate to Developer Center and click EDI settings.
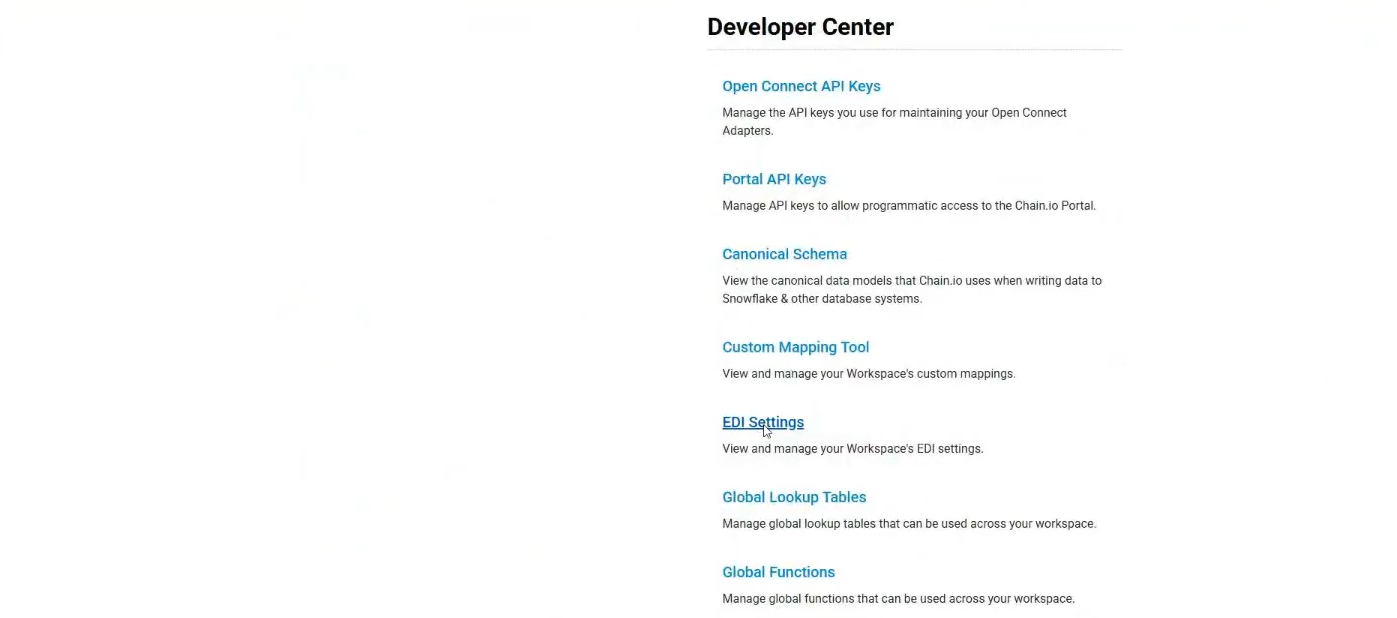
The system refreshes to display the EDI Settings page.
In order for the Control Numbers table on the EDI Settings page to populate, there must already be a Flow containing an outbound EDI Adapter. If you attempt to access the Control Numbers table within a Workspace that does not have an EDI Flow, the table will appear blank and state “No available options.”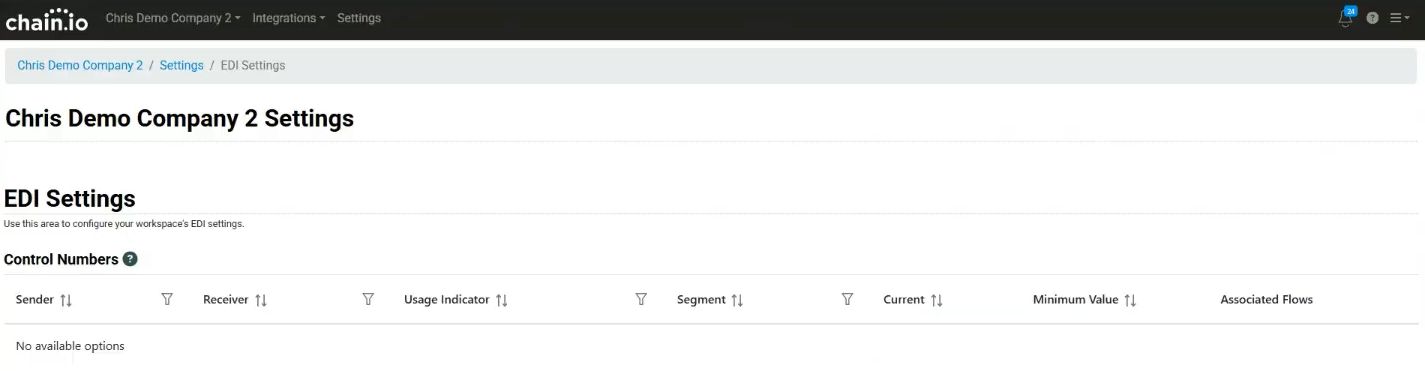
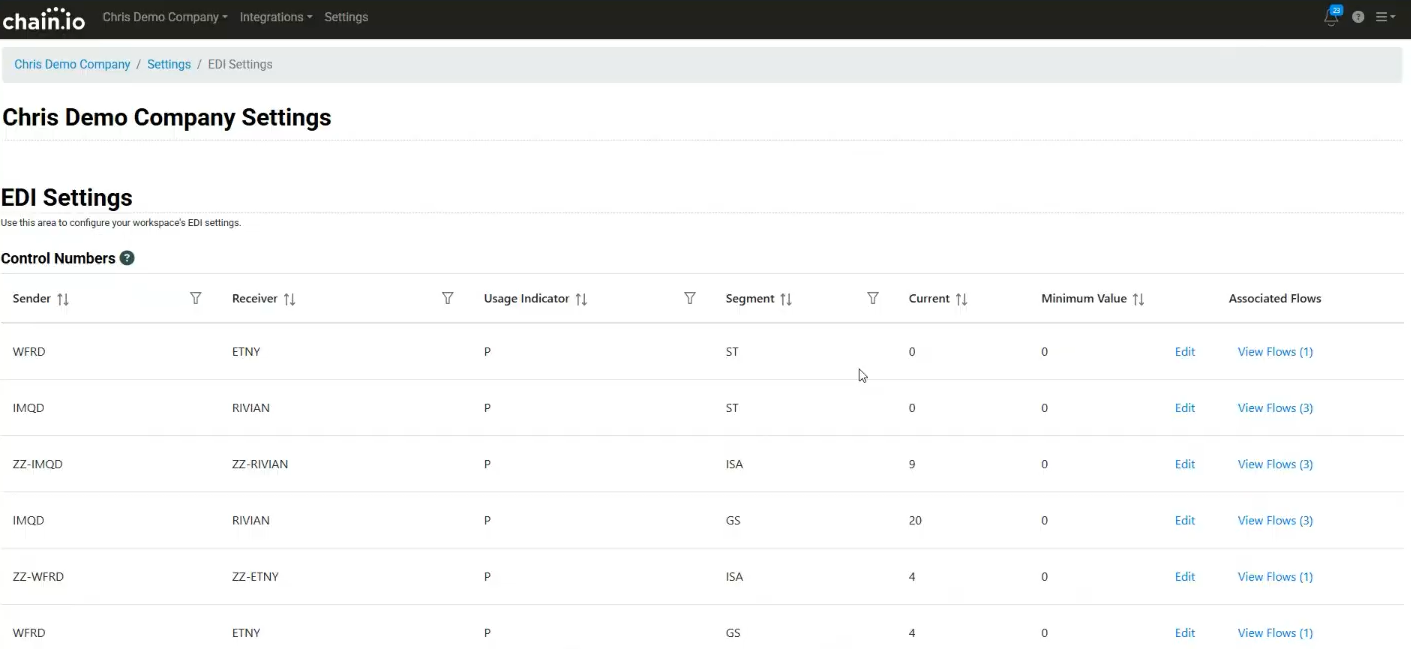
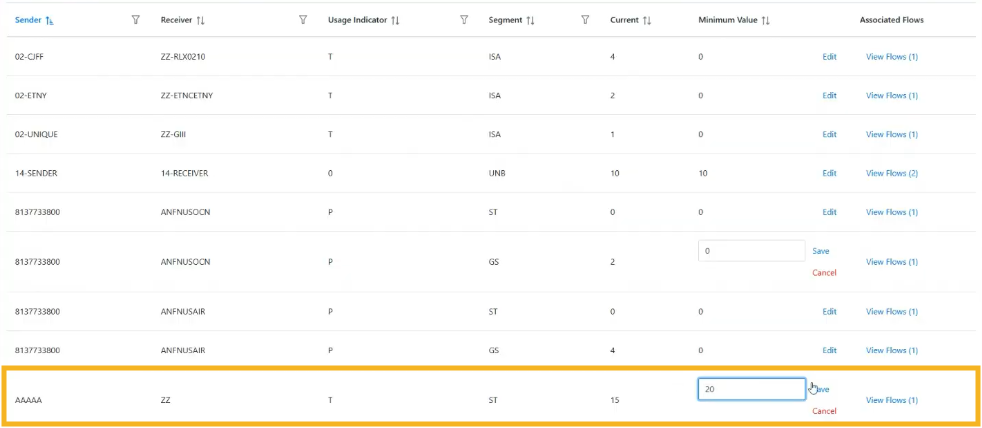
The Control Numbers table, contains information about the following parameters:
- Sender
The value is the sender qualifier. - Receiver
The value is the receiver qualifier. - Usage indicator
The value can be “P” or “T”.- “P” = production environment.
- “T” = test environment.
- Segment
IST, ISA, and GS are the three segments for which control numbers are generated.- ST = Starting segment ST is the X12 control number tied to the SEnder ID and Receiver ID specified in the Flow Destination File Type configuration.
- ISA = Header segment ISA is the X12 control number tied to the combination of sender qualifier and sender ID or receiver qualifier and receiver ID. When the segment is ISA, the sender ID is formated as sender qualifier - sender ID (e.g. ZZ - 8137733800 where the sender ID is ZZ). The receiver ID is formatted similarlyas receiver qualifier - receiver ID (e.g. ZZ-ANFUSOCN).
- GS = Group header segment GS is the X12 control number connected to the application sender code (or sender ID if sender code is blank) in the Flow Destination File Type configuration settings. It is also connected to the application receiver code (or receiver ID if receiver code is blank).
- Current
The amount of times the Flow has previously run. The number increases by one each time the Flow runs. If there is a value in the mapping file, this value is used, and it is not necessary to manually alter it. - Minimum Value
If the minimum value is 0, then a minimum control number value has not yet been configured. The minimum value cannot be below the current value. You can set a minimum value higher than the current value. After adjusting the minimum value, the next time the Flow runs, the current value will equal the new minimum value. - Associated Flows
Click View Flows to view the Flows associated with the given sender and receiver. The value next to the clickable View Flows text is the number of associated Flows.
All of the table columns can be filtered in ascending or descending order, with the exception of the Associated Flows column.
- Sender
Changing the Minimum Value
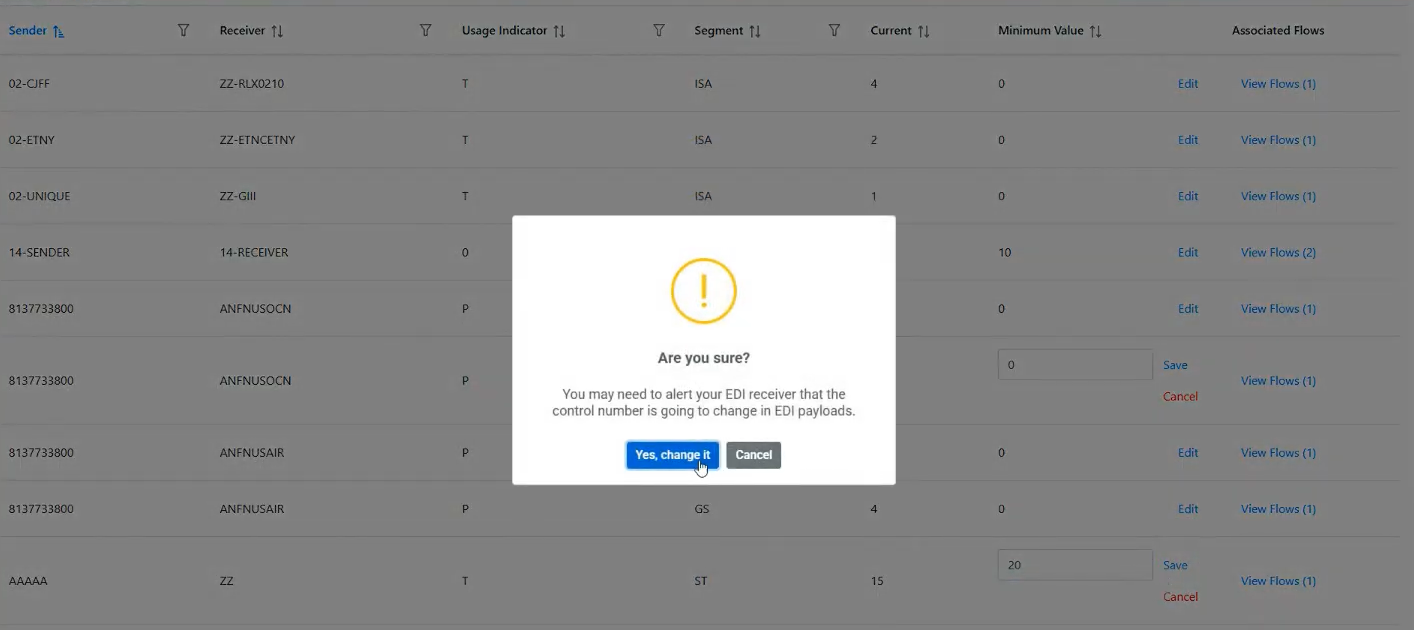
Follow the steps below to change a control number’s minimum value.
- Click the minimum control number you wish to change. This will activate a text box.
- Enter the desired minimum control number.
- Click Save to confirm the change. Otherwise, click Cancel.
Example
The current value was 15 and the minimum value was 0.
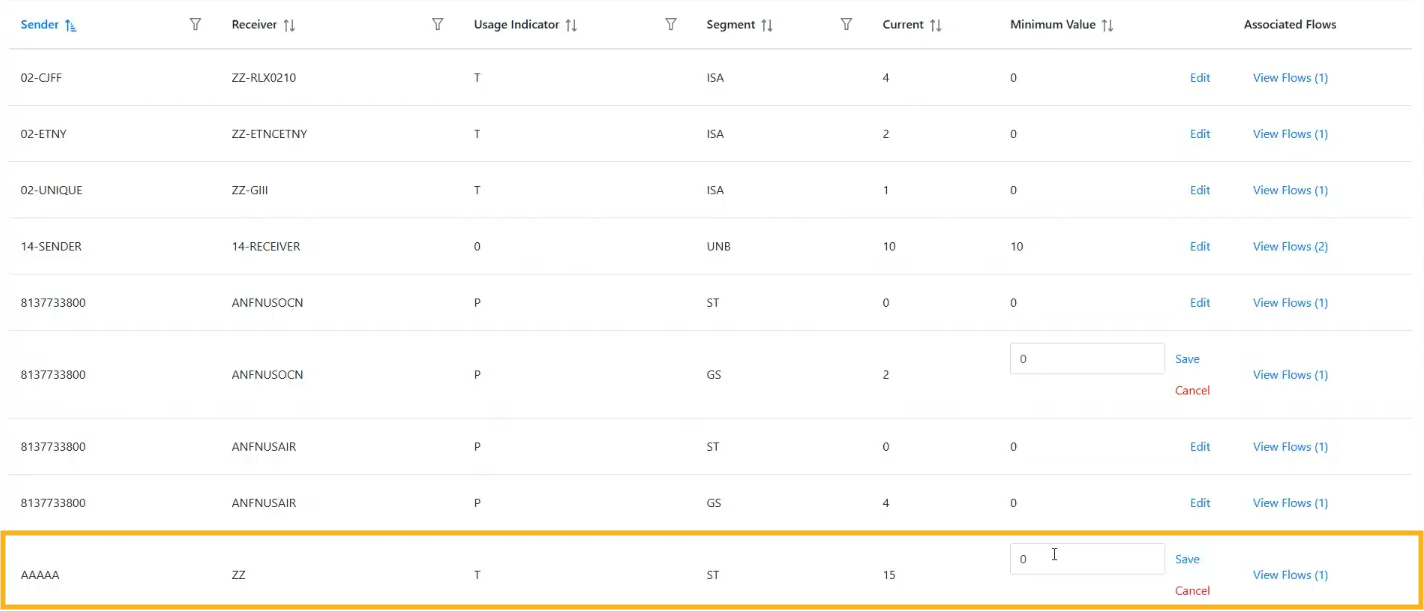
The minimum value was updated to 20.
The update was confirmed.
The minimum value change was registered.
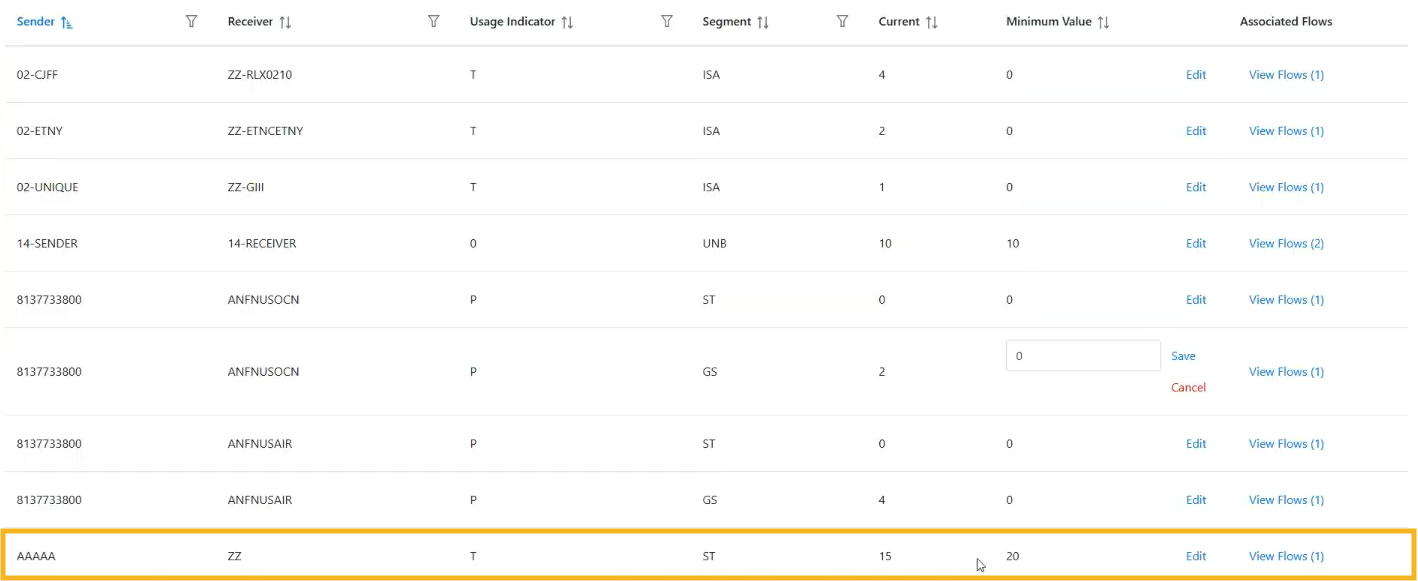
The next time the Flow is executed, the new current value will be the recently updated minimum value.
Creating a EDI Flow Using Minimum Control Numbers
- At the top menu bar, click Integrations and select the Integration of choice.
- At the top right of the screen, click Integration Settings from the hamburger menu.
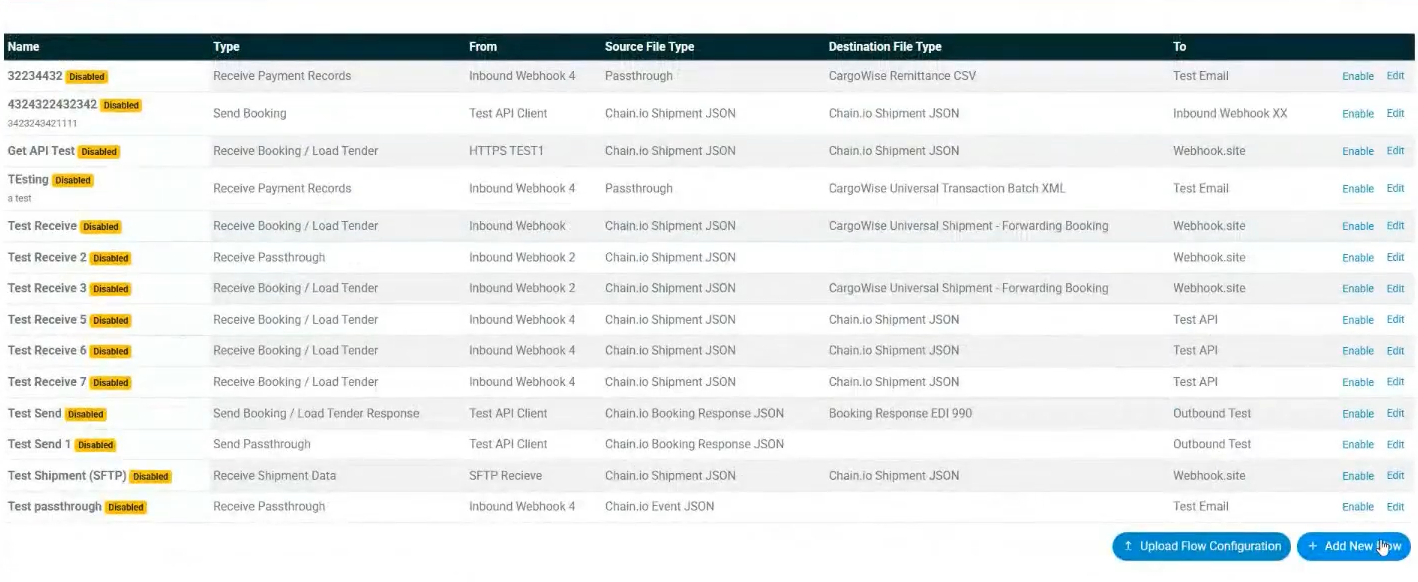
- At the bottom of the Flows table, click the blue Add New Flow button.
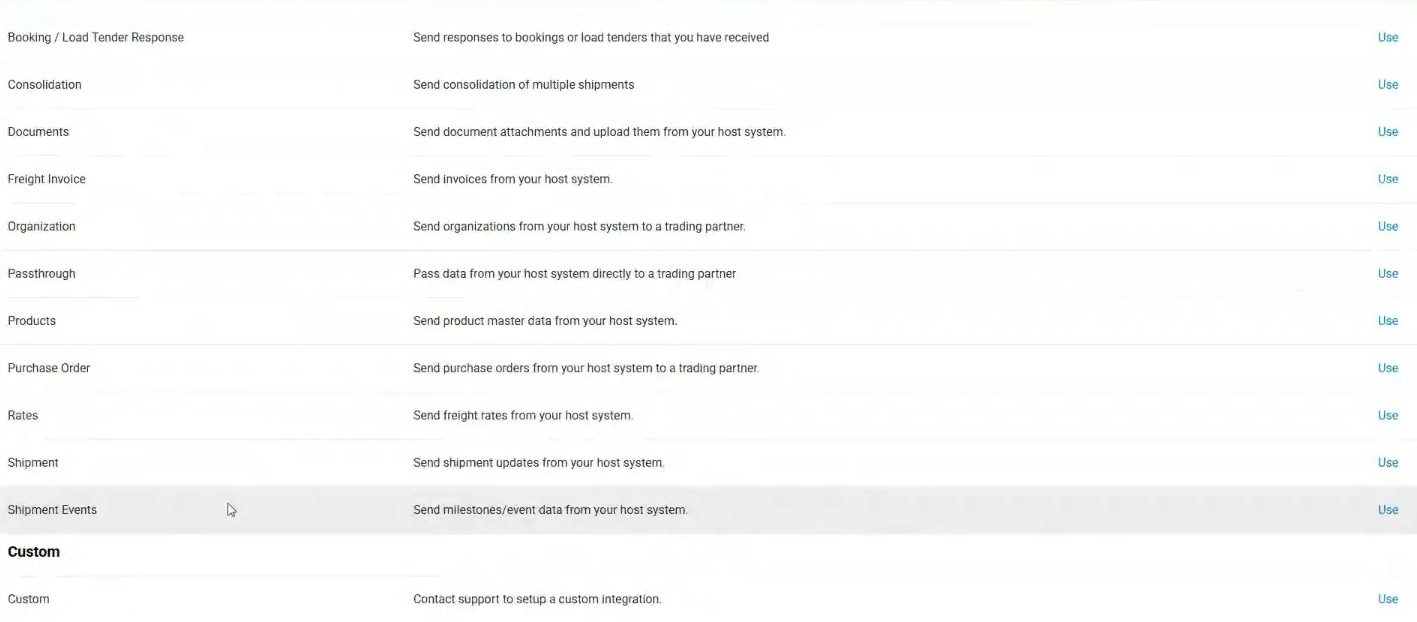
On the New Flow page, select a Flow type that supports EDI files. In the example below, the Shipment Events Flow type is selected.
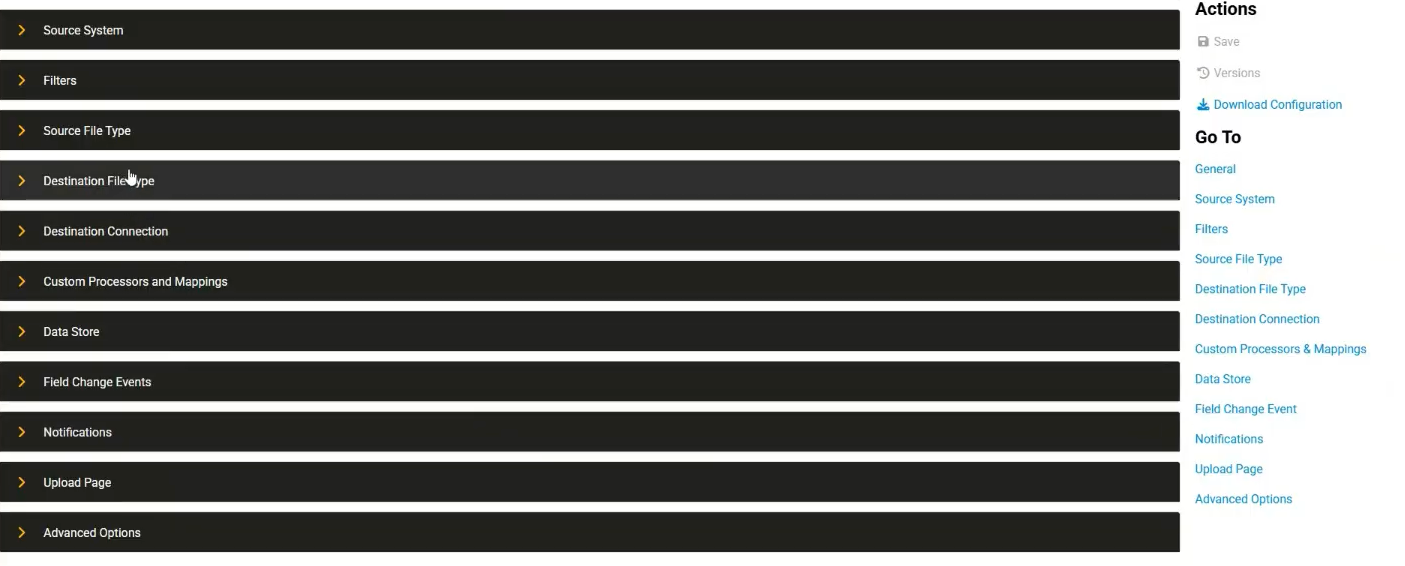
- On the Flow configurations page, click the General subsection.
- Enter a name for the Flow.
- Click the Destination File type subsection.
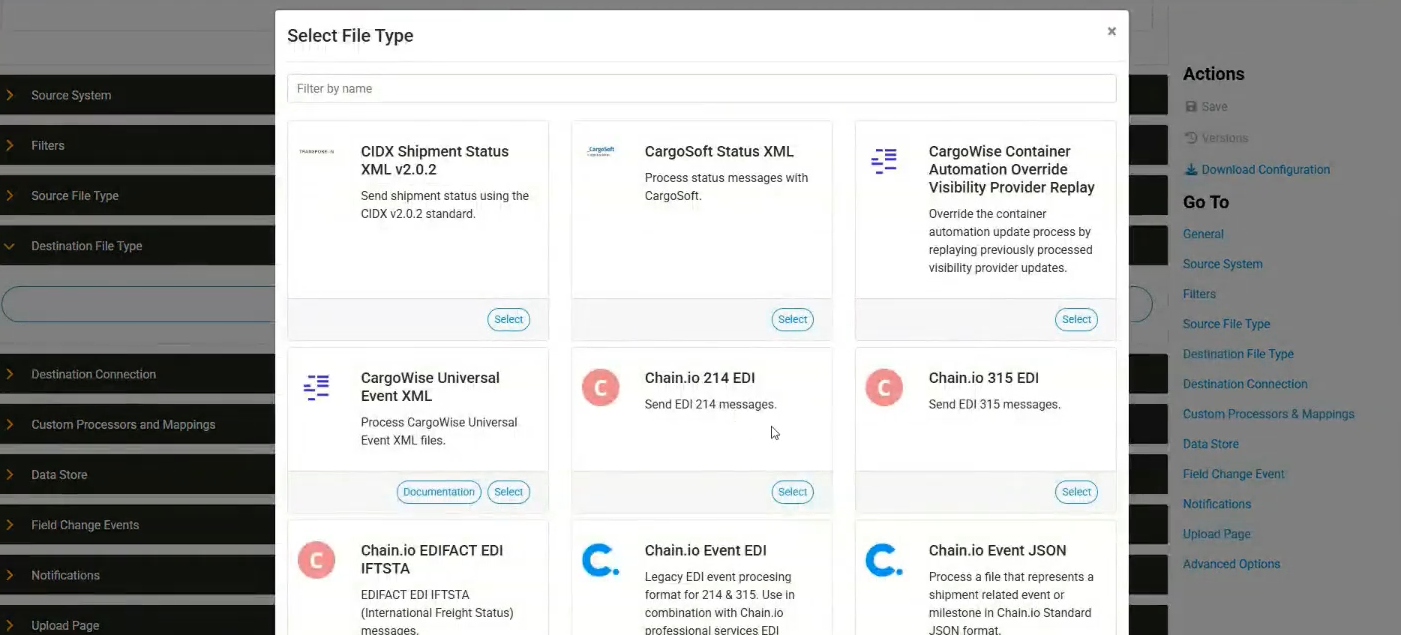
- Click Select File Type and choose the appropriate type of destination EDI file type. For the example below, Chain.io 315 EDI was selected.
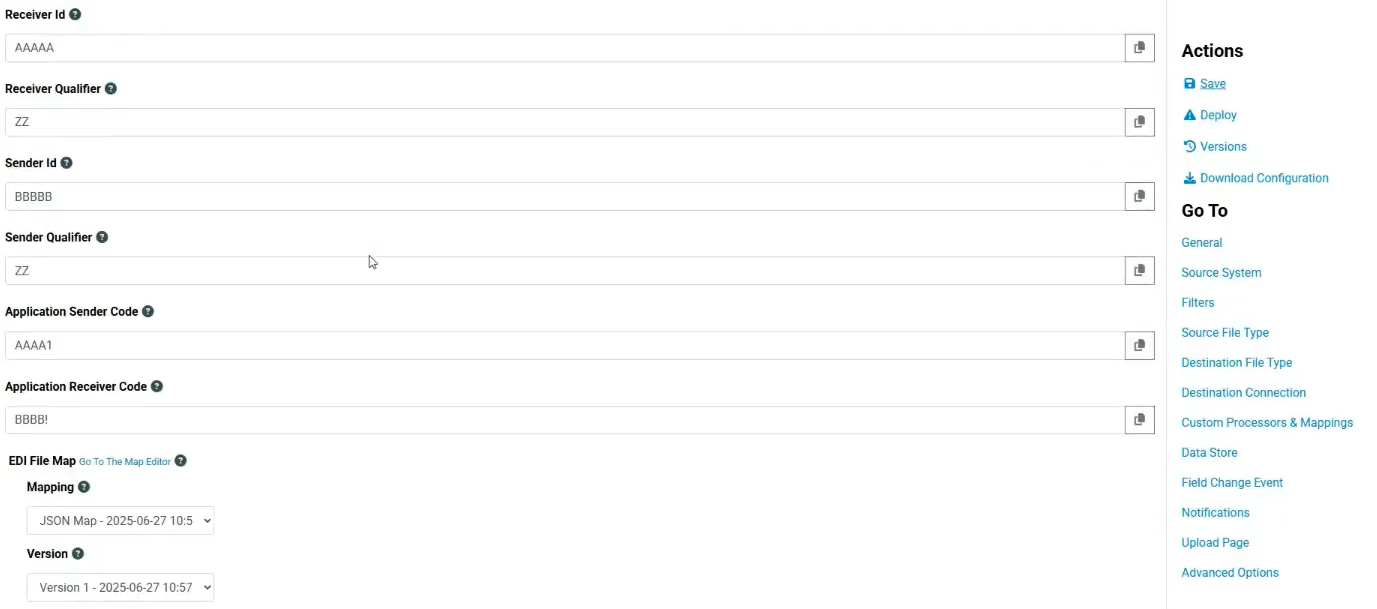
- Enter relevant information including the receiver ID, receiver qualifier, sender ID, sender qualifier, application sender code, and application receiver code.
- Under the EDI File Map subsection, select the appropriate mapping and version.

If you do not already have a deployed JSON to EDI mapping, navigate to the Custom Mapping Tool to create one. The mapping must be saved and deployed in order to be usable in a Flow.
For more information on creating a custom mapping, refer to the Custom Mapping Tool support article.
- Within the Actions menu on the right side of the page, click Save to save your Flow configuration settings.
- Within the same menu, click Deploy to implement the configuration.
- At the top right of the screen, click Workspace Settings from the hamburger menu.
- Navigate to Developer Center and click EDI settings. The Control Numbers table is populated with the sender and receiver values assigned during the Flow configuration process. Minimum values can now be set for the control numbers.
Was this article helpful?
That’s Great!
Thank you for your feedback
Sorry! We couldn't be helpful
Thank you for your feedback
Feedback sent
We appreciate your effort and will try to fix the article